
Portal Hero PrestaShop module: installation and settings
Install and configure the official PrestaShop module: every field explained so you can publish your catalogue on the portals.
Automate the management of your catalogue on the portals with our PrestaShop export module. In this guide, we show you step by step how to install and configure this tool so you can synchronise your products quickly, easily and efficiently. Start making the most of its full potential today!
Installation
You can download the module directly here:
Below is a video showing its installation step by step:
Configuration
Once the module is installed, it needs to be configured. To reach the configuration page, you can either click the button after installing the module, or search for 'Portal Hero' in the left-hand bar. The following configuration page will then appear:
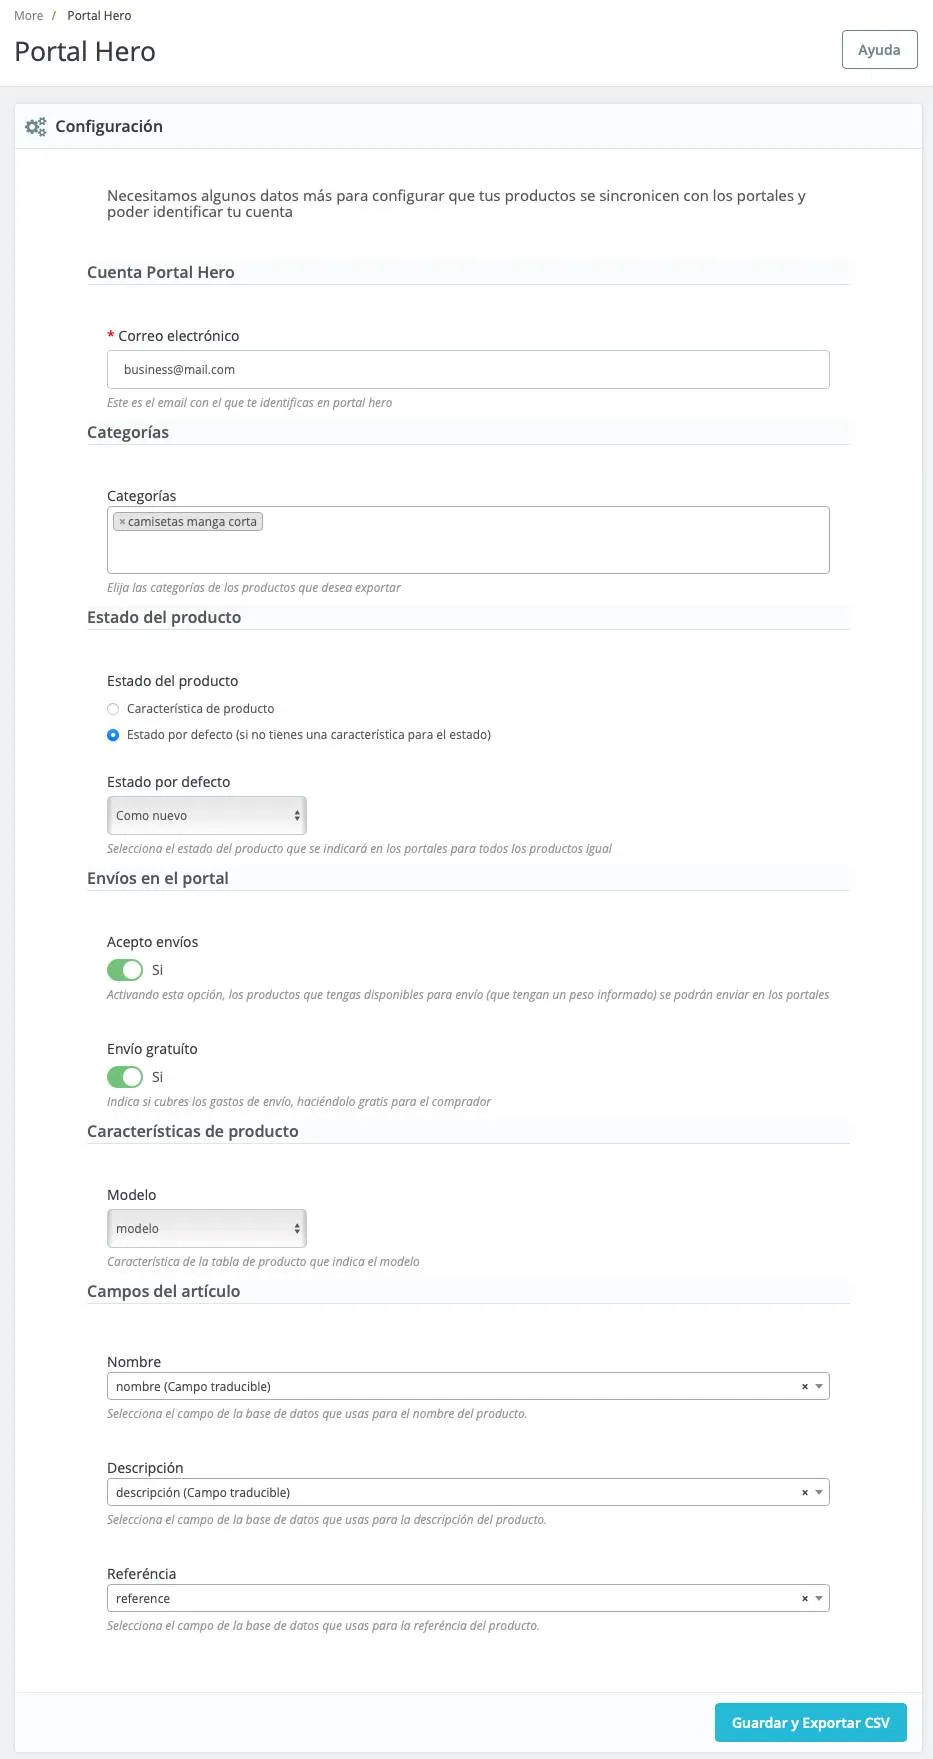
- Email address: Enter the same email address you used to register or communicate with Portal Hero.
- Categories: Select one or more categories from the list of your categories to filter the export. If you do not select anything, the entire catalogue will be exported unfiltered.
- Product condition: There are two options here:
- Use a product feature: In this case, you will have to select one of your predefined product features that indicates the product's condition. At the time of export, this will be the value used for each item.
- Use a default value: If you do not have a product feature that indicates the condition, or all your items simply have the same condition, you can select one of the available conditions, and all items will be exported with it.
- I accept shipping: Enabling this option activates shipping on the portals that offer this service (for example Wallapop Envíos). Items for which you have a weight reported will be marked as available for shipping.
- Free shipping: Enabling this option means all the products in your catalogue will be exported with free shipping on the portals.
- Model: This setting is optional. If you have a product feature that indicates the model, select it.
- Name: Select the product field to be used as the name in the export. By default it is the product name. If you do not have a specific configuration, there is no need to change it.
- Description: Select the product field to be used as the description in the export. By default it is the product description. If you do not have a specific configuration, there is no need to change it.
- Reference: Select the product field to be used as the unique identifier in the export. By default it is the product reference. If you do not have a specific configuration, there is no need to change it.
- Name field: This setting is optional. If you want a value other than the normal product name to be exported as the product name, select from the list which field you want to use.
- Description field: This setting is optional. If you want a value other than the normal product description to be exported as the product description, select from the list which field you want to use.
- Reference field: This setting is optional. If you want a value other than the normal product reference to be exported as the product's unique reference, select from the list which field you want to use.
Finally, click the "Save and Export CSV" button, and a green message will appear if the configuration was saved successfully.
How synchronisation with Portal Hero works
For the general workings of synchronising your catalogue with the different portals, you have more information available here.